

About several months ago the following conversation transpired between myself and my girlfriend...
Her: We should go to BlizzCon.
Me: Seriously?! I mean sure I'd go but we'd have to actually get tickets and everything.
Her: And I've have to dress up as something.
Me: Wait what?
Her: Yeah. You know like cosplay some character.
Me: Ohh. Got it. What are you going to go as?
Her: I don't know, Sylvannas is cool.
Me: Yea but a lot of people dress up as her.
Her: Yeah I know they do. I mean there are the Diablo 3 women but...I guess those are kind of overdone too.
Me: I'd be willing to help you if I had some say or involvement in building said thing.
Her: Ok. So then what do you want to do?
Me: What about a character that no one really talks about and is well beyond both of our ability?
Her:...and that is?
Me: The Medic
So we did that.

I've been a fan of StarCraft ever since it was released and I was even more thrilled when the expansion that came out and introduced the Medic. Fast forward several years to October 2015 and Blizzard releases Lt. Morales into Heroes of the Storm. This game was fun for all the nerdiest of reasons - all of their game franchises were suddenly all thrown into a single game letting people finally live out their nerdy philosophical debates of who'd win in a fight betwe...alright you get where I'm going. Insert really geeky things and such here.
But bit of a problem with this whole "create a real Lt. Morales thing" - I'm not a cosplayer in any regard. In fact the only two things I know about cosplay is really that "cosplay" is in fact a word and "Pepakura" gets thrown around a lot. I've never used the software (because I've never had a use for it), but in short it's a rather popular modeling program that lets you convert 3d objects to 2d surfaces, print them out on regular paper, and then create models by just taping said printouts together.
But just because I'm not involved in cosplay, doesn't mean I couldn't get involved in it. Because what I lack in cosplay ability I'd like to think I make up for in being a super huge computer dork. In a previous project of mine I didn't own the full blown version of AutoCAD (and I still don't), but I know there are more than enough open source/free solutions available to where I should be able to assemble a crude model of Morales together.

But I/we certainly have some initial hangups before I even get started:
- How do I even make those shapes? Eh, ok just going to have to figure that out I guess.
- Once I get the shapes and make them, how do I attach them to a real person? A harness? Well I can't buy a harness for a custom costume. We're probably going to have to make a custom harness. Crap. We probably have to make a custom harness.
- What gives with her clothing underneath the costume? You know what, it's a wetsuit or something. We can probably buy that...wait its got this hexagon patter...really?! Her clothes have a pattern...ughhh crap. We probably have to make a custom bodysuit.
- Wait a second. How does the shield connect to her arm? What do you mean it just floats there in the game? That literally defies the laws of physics. Double crap.
Wow I'm really starting to regret this entire idea. But we have 9 to 10 months to figure all of this out before our first Blizzcon. So enough talk, let's wind the clock back to January of this year and get started.
January 2016 - Research
"We have a really giant costume to make. But make it out of what? Plastic? I need to form plastic. I've never formed plastic. Even still, I'd need something to model it from. So that means I'd probably have to build it first, take a mold of it, ugh I don't like the sound of this already. I hear a lot about fiberglass...no I have to mold that on something as well. Wait! 3d print? Pretty much out of the question, these are really huge pieces so that isn't going to happen. I could do a lot of little pieces, but that requires a re-engineering of the costume in it's own right to get all the parts to link together. Not to mention that assumes I have the 3d model already. Alright, alright, I hear a lot of people in the world of cosplay use foam. I don't know what kind of foam...are their kinds of foam? Alright foam. I'm using foam and I'll just go from there."
Now, while I was thinking all of this over and sharing it with my friend Jordan, he says to me "You should watch this show Heroes of Cosplay...all they do is that stuff. But if you don't watch it, I know all I hear is 'L200 foam' and 'EVA floormats'". Well two thumbs for Jordan, because that's at least something for me to go off of!
Now, while I was thinking all of this over and sharing it with my friend Jordan, he says to me "You should watch this show Heroes of Cosplay...all they do is that stuff. But if you don't watch it, I know all I hear is 'L200 foam' and 'EVA floormats'". Well two thumbs for Jordan, because that's at least something for me to go off of!
EVA, L200, open cell, closed cell, craft foam, etc. Turns out there are lots of different kinds of foam. But as I expected each one has it's host of applications, uses, durability, rigidity, etc. But of course hitting on L200 and EVA apart from where to buy there was also an absurdly high amount of independent cosplay blogs, forums, etc, that seem to almost universally cite these very specific materials. As a casual observer, this can't be a coincidence.
- EVA floor foam - This seems to be a really popular choice. Smooth on one side, textured on the other. It's available at Home Depot and workout equipment style places. It's 1/2" thick and used for play areas or workout rooms. It's seems to be very durable, rigid, and very malleable under a heat gun. It's easily accessible (in that I could drive somewhere to purchase it) and immediately start crafting. Even after a few Google searches I started finding costumes where if you looked closely enough you could see the textured/rigid side of this particular foam.
- L200 foam - This also seems to be a specific grade I seem to see mentioned on a variety forums. It comes in all sorts of thicknesses, is a closed cell foam, and clearly useful in a wide variety of applications. It's not nearly as rigid as the EVA foam, but seems to have just the right amount of flex to be useful in a host of costume scenarios. With regards to the "specific grade" I also stumbled across things like L100, L300, etc.
So my girlfriend bought the EVA 1/2" and I bought L200 1/4". She liked that the EVA foam was rigid and durable. I liked L200 because I perceived it's flexibility to be what I needed to get all of these really defined shapes done quickly without having to constantly bend/melt foam with a heat gun. The thing that holds true as two grossly uneducated people on this topic is that we're both about to walk away with some new knowledge after this foam experience.
So while we waited on the foam to show up we swung by an art store to grab posterboard and foam core. No intention of actually using it in the costume, but it'd give us a really good idea how big the items are, we could practice cuts, and all sorts of other things. Because for as much as I've been finding people free-handing costumes and create all of these really amazing shapes I thought to myself "Surely I can do this!" Granted I've never done it before, but let's see what happens (on this practice material). But the question is what piece do we start with?
I'm not sure why, but eventually we agreed the thigh would be a good starting point. They are cylindrical, they'd pull over her leg..."Yeah. Yeah. This sounds good. Seems like the easiest shape to try out first" we told ourselves. To be clear here is the shape we're going to try to create from Morales -

Again - without foam this was first tried out on posterboard. I used a kid's protractor to give me the circle and ultimately went for this triangle like shape.


And I won't lie, we felt really good about this (this brief 20 minutes of work for two people that have never done this). That brief moment of "Alright so the shape probably gets cut like this." With the seam visible on her inner thigh it became even clearer that "Oh brilliant! We'll glue there! It makes so much sense!"
But looking at this piece, even if we cut it in foam it's missing quite a lot. Like...all the definition. Some of the nuance near the top bulges out a bit. The inner thigh piece sits lower than what we had above. We don't really have the thigh piece, we have something in the vague shape of the thigh piece. This isn't even remotely close to final/presentable. That's when I said -
You know what would make this easier? If I 3d modeled the thing. I just have to take measurements of you and then I'll start drawing this digitally in CAD. Then maybe we can use that Pepakura we hear everyone talk about.
And that's exactly what I did...well I tried to do rather. I fired up 123Design (freeware from Autodesk used for 3d printing) and started free-handing as best as I could the shape I wanted. Then I exported my STL to Pepakura and unwrapped. Again, a minor victory but still...it isn't the right shape. Certainly closer! But still not really it.
 |
| Pepakura: left is the 3d object, right is the unwrapped object showing where to fold on paper |
If it isn't clear, the whole payoff of 3d modeling this first BEFORE trying to cut it out are two things:
- Not wasting material while no less winging it the entire way
- You can quickly scale up or down without having to "re-draw" anything. Talk about being vital for a wholly custom costume that will have to fit her pretty much perfectly.
It's with the above said it seemed really clear that "The whole thing has to get 3d modeled because we are not nearly artistic nor experienced enough to free hand these things."
The next day another friend of mine...
Mark: You know Dzak, if you had the 3d model of the Medic it'd be easier.
Me: ...yeah. Thanks for pointing that out. You are clearly a genius.
Mark: I'm just saying.
Me: I KNOW! Of course if I had the 3d model it'd be easier! But where the hell am I supposed to get that?!
Later that night...
I resumed work on the above sketch for the thigh piece constantly extruding, champfering, and everything I possible could to get close to this shape. Then the conversation I had with my friend earlier hit me and I really started to think on it.
Alright. Seriously...how hard could it really be to get the 3d model out of the game? I have the game installed, SURELY those files are somewhere on my computer. No, no...this is possible. This can be done.
I'll spare you the next 6 hours of self-study, beating my head against a desk, and jump straight to the point.
CascViewer - a freely available tool on the internet for exporting Blizzard files from any of their game's internal storage out to a file(s) on your desktop. Using CascViewer and fumbling my way through the Heroes of the Storm install directory I found the Medic and exported her files (3d model and skin). But the files are still a proprietary Blizzard format, *.m3 for the model and another weird format for the skin. Good news though, if you open up the skin file in Internet Explorer it will load and thus enable you to use right-click and save as a *.BMP for use in any number of photo editing tools (Gimp, Photoshop, etc.). Halfway there!
M3_Import for Blender - I've used Blender (it's an open source/free 3d modeling tool) before so this is nothing short of crazy brilliant that someone went and wrote the plugin for it. There are boatloads of tutorials on Blender out there so I won't bore you with the details of "Here's how I installed the plugin." I mean, I will if this becomes a source of a lot of questions, but for now I'm skimming over those basics of how to setup Blender
So with just a little work (6 hours for me, hopefully far less for onlookers) this is possible using the two aforementioned tools. Furthermore I truly can't thank the respective authors enough for their time and dedication to said code. Thank you for being beyond awesome! It also hopefully goes without saying that this means if you're looking to do a different character, you could easily perform almost the same steps.
With the M3 Import for Blender, this means I can now take Blizzard's game file, import into Blender, and then export to STL. Once it's in STL (an incredibly common 3d object/3d printer file) I can actually work with that in ANY NUMBER OF OTHER SOFTWARES! I can scale, I can erase, I can add - I can do whatever I need to in whatever 3d modeling software I choose because of this standard format. But because I'm a fan of doing this on the cheap (i.e. free where at all possible) and of course eventually wanting to share the whole process, I elected to use Autodesk Meshmixer. This is a free piece of software from Autodesk that's used for 3d printing. Granted I'm not 3d printing the Medic, but I am going to want to make a lot of adjustments to her before I start transferring her into Pepakura and ultimately printing out. Not to mention an STL is a single file. It's a single object. If I were to just up and export the STL from Blender right into Pepakura, it'd be unwrapping the entire character into a 2d image...with that said I have to cut pieces away from her, I have to erase things we aren't going to make (like her arms), I have to create separate pieces for each part I want to construct. So I need someway to edit this otherwise "flat" STL file. Meshmixer allows you to take a single object, and rather ingenuously cut items away with ease.
Before I keep going, curious to know what she looks like?
 |
| Lt. Morales (*.stl) in Autodesk MeshMixer |
Now you'll notice in the above photo her weapon is orange (i.e. the item has been selected independent from the rest of her), but if you look really closely you'll notice I accidently picked up some of her arm. This is actually ok for two reasons:
- I'm going erase her arm because we aren't going to make her arms
- I just need to get the weapon away from her to edit on its own. I can erase the parts of her arm once it's separated.
But that's just the beginning. Because if you take this to its logical extreme I cut and separated EVERY piece of the Medic so as to make the Pepakura build as easy as possible (to in turn make the foam build as easy as possible). That means once the weapon is pulled out I still have to break it down into it's smaller parts. The two flanking syringes, the wrist shield, the middle ring, the cannon, etc. etc. Again this process is repeated for EVERYTHING you see on her. Legs, shoes, thighs, calves, everything.
So what does a fully exploded Lt. Morales look like?

I think what's interesting here is that once she's separated the build process conceptually starts to make a lot more sense (to me at least) and actually become a whole lot less intimidating. Because when you start staring at the individual parts, suddenly these pieces don't seem all that complex.

So in the above photo you can see I have my leg split up. Thigh, calf, shin guard, shoe.
Wait a second, why does the shoe look like that? It's got that cut right in the middle of it on the top. You screwed up!
Don't forget, this is the model extracted directly from the game and thus right from Blizzard. Chances are they are only interested in animating what is actually seen in the game. It's also at this point I realized that with the help of Meshmixer I'm going to have to punch holes in the thigh and calf because since we're designing this for a real person, you'll have to get your leg through somehow!

So this is great because now I have the leg pieces and I can export this collection of STLs to just the STLs I want. All I have to do is select the piece in Meshmixer and hit export. This new STL I've exported is now whatever item I have selected. So I did that...for every single piece I wanted to break up. Here's the calf in Pepakura after several hours of arranging pieces, changing where my cuts were, and organizing them on individual sheets of paper.
 |
| 3d model/STL on the left, 2d unwrapped/rearranged and ready to print on paper to the right |
Now as someone who understands the basics of 3d modeling I was a bit blown away to discover that Pepakura was genuinely unlike anything I've used before. There were a few things that made sense, but I didn't find it intuitive coming off of my other related (software) skillsets. It's worth noting that 123Design, Meshmixer, and a host of other free software allow the process of converting a 3d model to a 2d surface however what Pepakura has going for it is the idea of "paper models" in mind making the cutting/re-arranging pieces a unique and necessary feature set to the program that I don't believe you'll find in most 3d modeling software(s).
After several nights of just fumbling through options, trying to get pieces arranged, and learning Pepakura as I go - I stumbled across a random link of "Tonight, live stream costume building Halo armor!" So I immediately thought to myself:
"Sure. I'll bite."
From said link is how I stumbled across Heroes WorkShop, Stealth and specifically this video -
WHAT THE...
This was super helpful because it confirmed some of my guesses (and really, my overwhelming uncertainties) about moving from paper to foam, dealing with bends, bizarre edges, removing flaps in Pepakura, etc. But more than anything it gave me all I needed to go off in several other directions. So what about the live "I'm building Halo armor costume stream"?
I cannot stress this enough, it is nothing short of brilliant to simply have this going on in the background and actually hear someone else's creative process and no less in real time! Now I'm not a Twitch person, so this was all incredibly new to me and blew my mind you could interact with hosts after you of course register and create an account, so I registered as fast as I could because I had questions for this guy! Well, I had a few questions. Alright I had one question about the leg piece I was about to try to create:
I got a really bizarre, round shape to build. It's incredibly round, smooth, has tons of curves. Any suggestions how to go about that?
Now I wasn't expecting a detailed answer, this guy is working after all so he could ignore this and I'd personally be entirely okay with it, but I did get enough of an answer to really solve some of my larger issues. I even posed the question to a friend of his who was also live on stream - Dave of Altered Cosplay and the unanimous, however simple answer was:
It's all in how you pattern it. Patterning is everything.
If this sounds like almost no information it isn't. Quite the opposite, it is beyond useful information. It is all the information I needed to confirm that I can clearly build this thing a thousand ways, but the easiest/simplest way is going to be the result of good patterning. Way to go Altered Cosplay. Thank you Heroes Workshop. Stealth/Dave also made mention of a YouTuber by the name of Evil Ted. If you have the chance to look up anything that man has accomplished do it! Ted Smith and his YouTube channel are dedicated to building all sorts of foam costumes and offer incredibly detailed walkthroughs for anyone to do. It seems to be no accident that several forums, blogs, and makers frequently mention Ted and his dedication to sharing this kind of work and how to DIY cosplay. Make no mistake gentlemen, I can't thank each of you enough for allowing outsiders a look into your own respective creative processes. It's great to find people who know that if a secret is the only thing keeping your work alive, it won't be long before someone else discovers and shares it.
Now where was I...
So after 11 versions of this leg piece, I arrived on a template that made sense to me (even though every single version I thought "Yeah this is done!"). What I ultimately arrived on was the idea of "tree-trunking" the calf so that pieces are built up from the bottom to top and stack on each other. This would allow me to create these really sweeping, round, smooth edges.
Performing this whole exercise is when I realized that when you really start studying Morales' features, she's got a lot of round curvy shapes to her armor. The calf in particular really drew this to my attention. What's more, looking at the artist rendition of her there was a lot of sweeping curves around her knee so it made a great deal of sense to make the cuts/seams there. Sure I don't want seams, but fortunately her armor does have a lot of natural seams/cuts just like the above model. Done and done...
TO THE FOAM!!!
It should go without saying, but this is the part I was the most excited about because now I could start moving this purely digital object to physical material and seeing what it looks like (And of course how bad I may have screwed this up). So to begin I'll need to do the following:
- Print my leg (calf) piece out of Pepakura to regular 8.5x11 printer paper
- Cut all the pieces out
- Tape them all back together
- Trace them on foam
- Cut the foam
- Glue the foam
 |
| Paper templates cut out ready to be traced onto foam |
- disposable nitrile gloves (I don't want contact cement on my hands)
- a respirator (I had the contact cement bottle open for about 2 minutes before I started feeling weird)
- a dremel with a fine sanding bit (if you choose a really rough bit, you'll quickly tear/eat foam away as opposed to smoothing it out.)
- Dap Weldwood Contact Cement
- Dewalt snap-off blade/knife
- Kershaw blade sharpener (because Evil Ted)
- L200 1/4" foam
Let's build the lieutenants' calf!


The above photo was actually the first time the following dawned on me - In Pepakura, the assumption is you are using paper so you're just taping all of your edges together. But I'm not taping edges with foam, in fact I have to have 1 of the foam faces glue to the other. Just think on this a bit, because it means your edges will never line up like they do in the model. One of the faces will be overlapping the other. This isn't an issue, but it does require some thought of the pieces you will eventually add to it.


I had two thoughts at this phase, the first was a little excitement and the second was "I shouldn't have actually cut the hole in this pattern. What was I thinking?"
 |
| This is the part that forms into the knee cap/cover |
 |
| These pieces are going to make up the back of the calf. It'll make sense in a few pictures down. |


 |
| THERE IT IS! Those pieces make sense now?! |


 |
| Now I'm starting to add more strips of foam to further build out those ball joint style knees |


Found a ball and with a heat gun, bent above knee joint into this indented shape
 |
| The other side of the calf isn't indented, it actually bows out. Given the how the size/shape, the foam is actually forced into this shape naturally and doesn't need to be heat formed. I guess I could have done it, but didn't seem necessary. |
 |
| There are so many free-hand 45 degree angles I did on this and no less with a pair of scissors. But afterwards, took a dremel to smooth out the imperfections and get a cleaner line/cut. That yellow surface area is the contact cement after it's dried for a few minutes. Once dry and you stick another piece of foam to it - it is not coming off. No pressure. Just line up your seams perfectly every single time...holy crap I'm doing just one leg now. How much of this costume is left? |


 |
| I spent a lot of time before gluing test pieces to figure out what should overlap and in turn what edges you'l see. With regards to how I assembled, I started with the inner most ring and worked my way out. The middle ring wraps around the bottom of the inner most, then the outer most ring is wrapped underneath that second ring. |
 |
| Hrm. Looks a little lopsided. I really hope adding the middle square piece forces these things apart. |
 |
| Yes, it does in fact force those pieces apart. Whew. Onto the knee guard! |


 |
| On second though this hole in this piece actually worked out because now I can carefully lay the ankle part on with two hands. I take back what I said earlier! |

 |
| This inner, indented ring I chose to glue its edge onto the indented joint. Had I gone the other way, the ring would possible be sitting higher than the other side. |


 |
| I feel good! Even though it's not done because I still have to add the knee guard to the front of it. |
 |
| First kneepad. It's the right shape, but I feel like I don't need all of those seams... |
 |
| Wait! New idea! Push the super seamed one onto another sheet of foam, trace, and then cut out the new one. Then I'll have no seams! I cannot believe people free hand this kind of stuff! Oh well, I guess that comes with experience. |
 |
| Crap. This is going to be difficult to glue down correctly. Maybe I should Velcro this? Hrmm.. |
 |
| Nope. Nope. I'm gluing it down. |
 |
| BOOM! THIS WORKED OUT SOMEHOW! |
 |
| IT WORKED OUT TWICE! OH YEAH! |
After finishing building both pieces I went straight to mod podge because I was super anxious to plastidip them after that!
Slow down. Mod Podge and Plasti what?
I kept finding a lot of people making foam costumes universally saying at one point or another:
Whatever you do, don't spray paint foam. It'll just eat it away. You need to "seal" the foam first and then you can paint it no problem.
It of course begs the question how do you seal foam? What do you seal it with? With just a little bit more research the most popular choices are (and it should be noted that a lot seem to choose at least two of the following):
- Mod Podge. It's like a wood glue and will fill all the holes on foam and make it a flat, even surface.
- Heat seal. This is really simple. Get a heat gun and just pass over the foam. It will at least close all of the holes and force the foam to become a flat even surface
- Plasti Dip. This is a spray on paint (come in the form of spray cans or buckets for air guns) that has a really interesting property - it's a spray on rubber.
Since I've never done this, I guess I'll just try mod podge? We don't know the pros/cons of any of this. Sure. Mod Podge it is! Then we'll spray on plasti-dip and then we can just paint after that! Wow this feels easy we can totally do this!
NOTE: There's that false self-confidence again.
OK! YES! Calfs are done. Well I mean they are kind of done. We have the definite shape of them. More so that than original paper, triangle like thing so that's a plus. But what about the thighs? I started this entire post talking about how we were going to start with that. What gives? Well while I've been coming up to speed on foam crafting, my girlfriend has been doing the same on the calves and shoes!
A brief thanks...
Speaking for myself I have to genuinely thank my friends (Jordan, Brian, and Zeno) who knew I was working on this for their non-stop feedback, support, constructive criticism, and one Saturday afternoon of assistance. Stealth of Heroes WorkShop, Dave of Altered Cosplay, and Evil Ted Smith for providing a means into their respective processes, tutorials, and being beyond welcoming to newcomers in this area. The indie developers behind CascViewer and M3 Import for blender, both of you deserve the highest of fives for said community software contributions. My family for letting this project consume quite literally EVERY SINGLE FREAKING WEEKEND this entire year and not entirely becoming concerned about my sanity for project turned obsession. Blizzard for providing endless hours of entertainment and the sole inspiration for this entire thing but above anyone else my co-author on this entire thing for being equally daring and crazy enough to undertake this and see it through no matter how it turned out my girlfriend, Erin.
In conclusion (for now at least)...
There is so much more of this costume to build, there is still an absurd amount of work ahead of us, we need to share everything she's been working on this whole time while I've been doing all of the above, and I'll be updating this post with a link to the next post the second it gets published (which hopefully isn't too much longer after you've read this entire post).
So in the interim to that post here's more pictures of Lt. Morales in progress!
 |
| To the contrary, this project in fact could not be taken a look at in a book. |


 |
| She found some cheap boots and built Morales' shoes around them. Certainly getting an idea of how we'll secure the leg pieces to her, but for now parts are just resting on top of one another. |
 |
| That giant shield will eventually have to exist. With some poster board we just taped two pieces together for a size comparison. |
 |
| Part of the weapon that I dremeled away to lay El-Tape into |
 |
| Weapon build in progress. |
 |
| There is that giant shield. |
 |
| Time to trace all the shield pieces onto foam! |
 |
| It took both of us to assemble the shield. |
 |
| Since the shield has a lot of natural seams... |
 |
| Got the front of the shield put together |
 |
| At least with the front of the shield together, we had to take a picture. |
 |
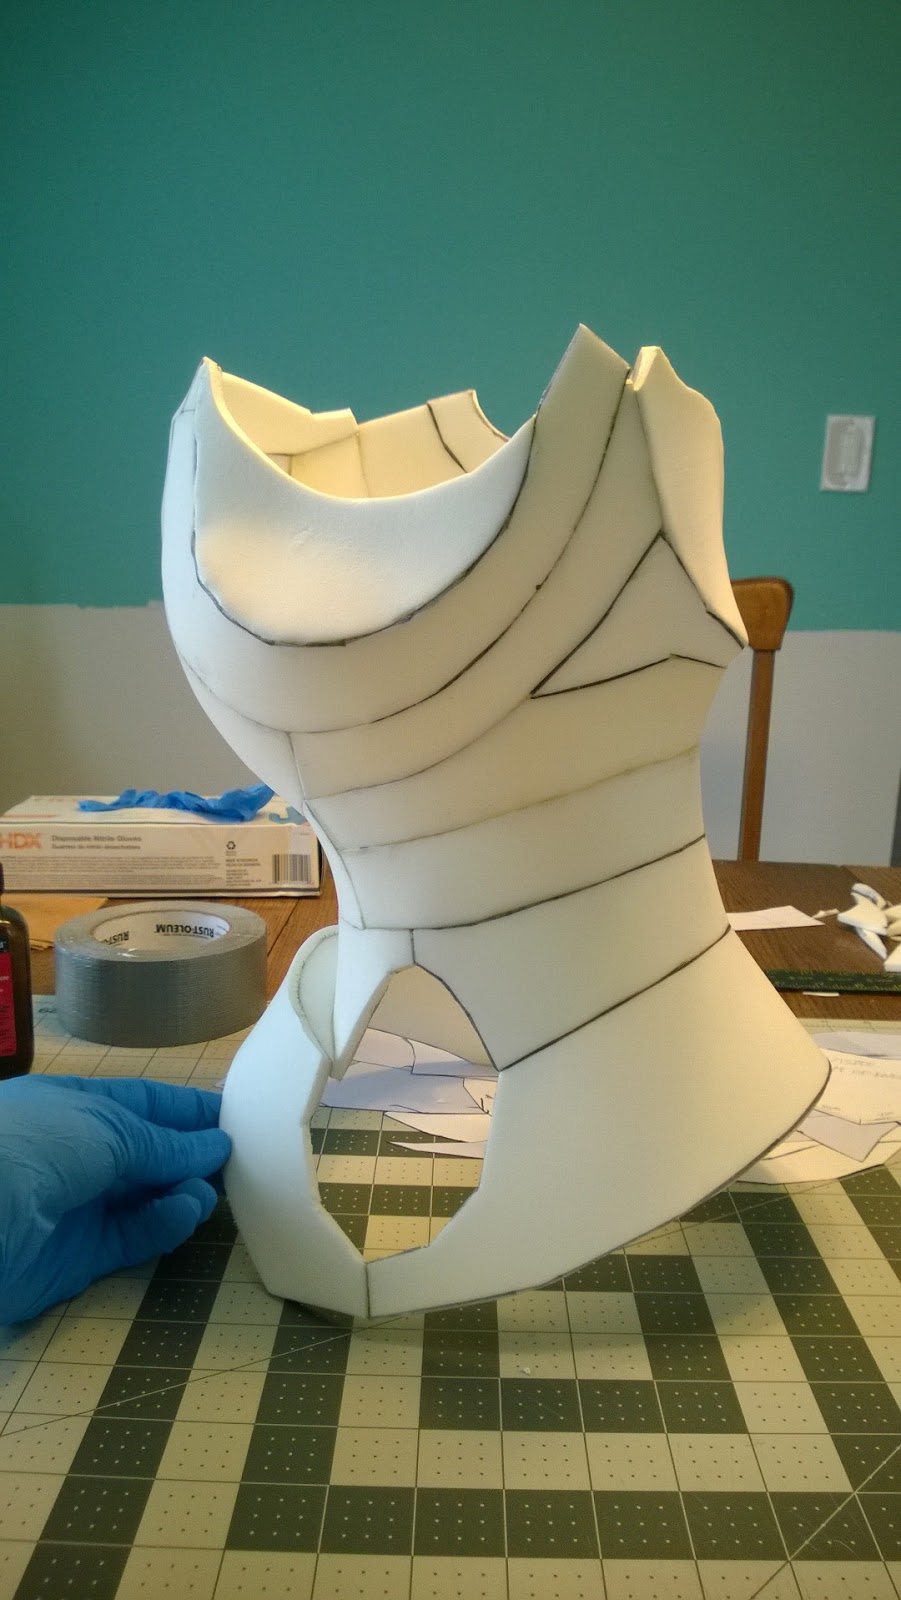
| Went through a few revisions on the initial chest piece trying to figure out the best size/scale. |

 |
| Before committing to foam, I traced all the paper templates out to posterboard and then taped those together. This would hold shape far better than paper and let us get an idea around size |


 |
| We are really starting to get stupid excited about this |
 |
| El Tape has arrived! |
 |
| Hrmm...gonna need to black parts of the el tape out. |
 |
| After teaching Erin some basic soldering/wiring |


 |
| You will probably spot Morales faster than you can spot me at BlizzCon 2016...but the above tshirt is how you could do it if you were so inclined. |


"Never tell me the odds."
- Han Solo